 View Video
Part Creation Using Script
In EDWinXP, parts can be created using Script Editor also. For that you can either use the packages and symbols in EDWinXP library or you can create new package and symbols as your requirement.
Steps Involved:
- Open Library Editor and choose Edit Script in
Edit option.
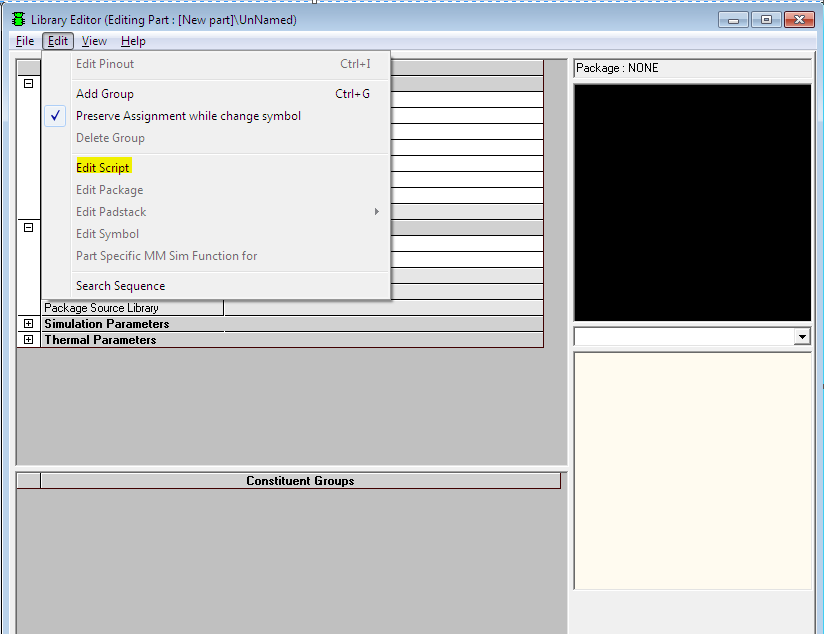
- A window as shown below will appear
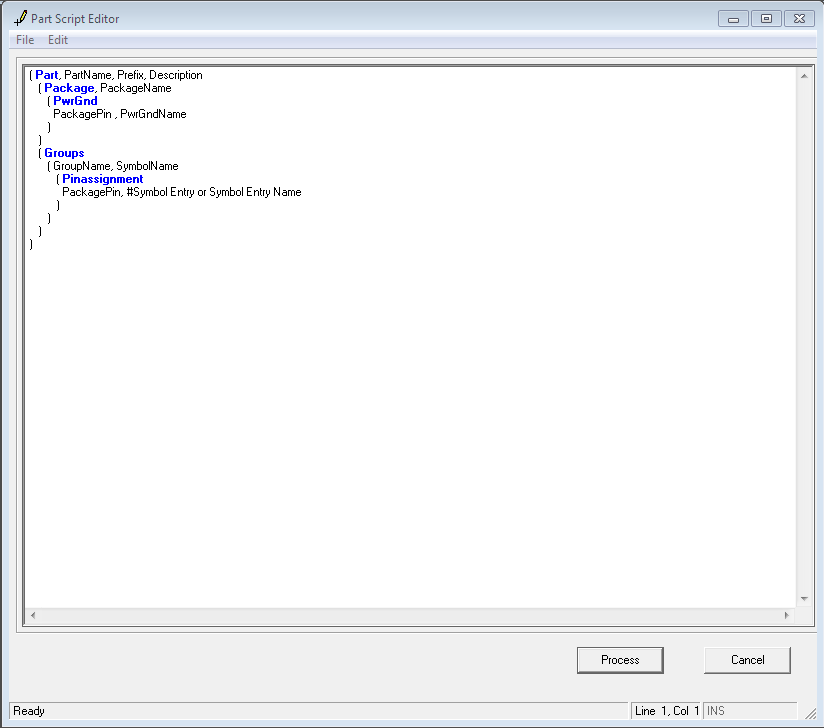
For example:
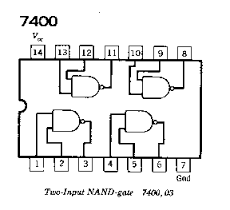
Let us create a 7400 NAND gate IC with package DIP14/300 and symbol 2NAND. The Package and Symbol are already created in EDWinXP. The 7400 pin-out is as given below:
After the keyword Part enter part name, prefix, and description of the part that you are creating.
So the script for 7400 is
Part, 7400, U, Quad 2-IP +ve NAND
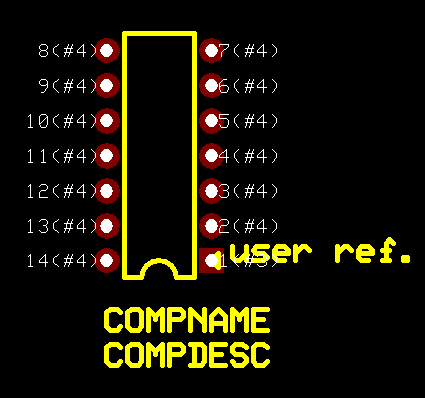
The package keyword is used to assign the package. The package
DIP14/300 is shown below. After Package, Enter the
package name:
Package, DIP14/300
PwrGnd is used to assign power and ground pins. Enter Pin number, Pin Name after keyword PwrGnd.
From Data sheet pin 7 is ground and 14 is VCC.
PwrGnd
7 , SPL0
14 , SPL1
Inside Groups enter the Group Name, Symbol Name. Symbol name should be the name of the symbol we are using. We can use as many groups as the package pins permit.
Groups
1, 2NAND
Pinassignment statement assigns the pin numbers of package to that of the symbol. Check the data sheet for pin assignments. For example in a NAND gate with two inputs A and B and an output Y. The symbol is shown below. From data sheet pin 1 and pin 2 are inputs and pin 3 is the output. Pinassignment syntax is
Packagepin, symbol entry name
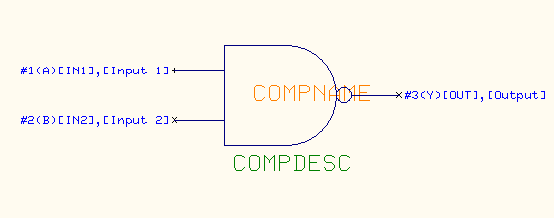
So the script here is:
( Pinassignment
1, A
2, B
3, Y
)
The 7400 IC has 14 pins that is 4 NAND gates with three pins each and pin 14 and 7 for power and ground. So we can assign three more groups here. Make sure to increment or change group name for each groups. The complete script is as given below:
( Part, 7400, U, Quad 2-IP +ve NAND
( Package, DIP14/300
( PwrGnd
7 , SPL0
14 , SPL1
)
)
( Groups
( 1, 2NAND,
( Pinassignment
1, A
2, B
3, Y
)
)
( 2, 2NAND
( Pinassignment
4, A
5, B
6, Y
)
)
( 3, 2NAND
( Pinassignment
8, Y
9, A
10, B
)
)
( 4, 2NAND
( Pinassignment
11, Y
12, A
13, B
)
)
)
)
After writing the script press the Process button at the right hand corner.
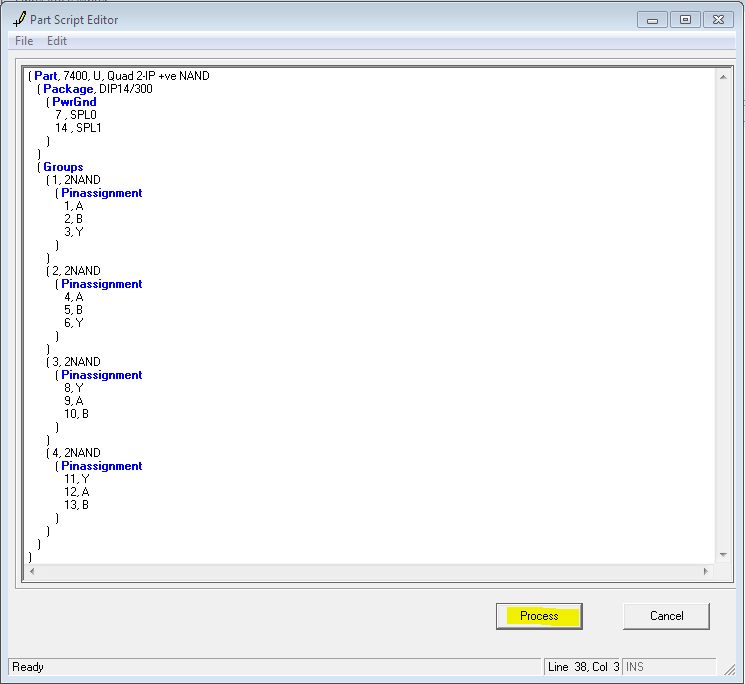
The script editor will process the script and check for errors. The errors if any will be displayed.
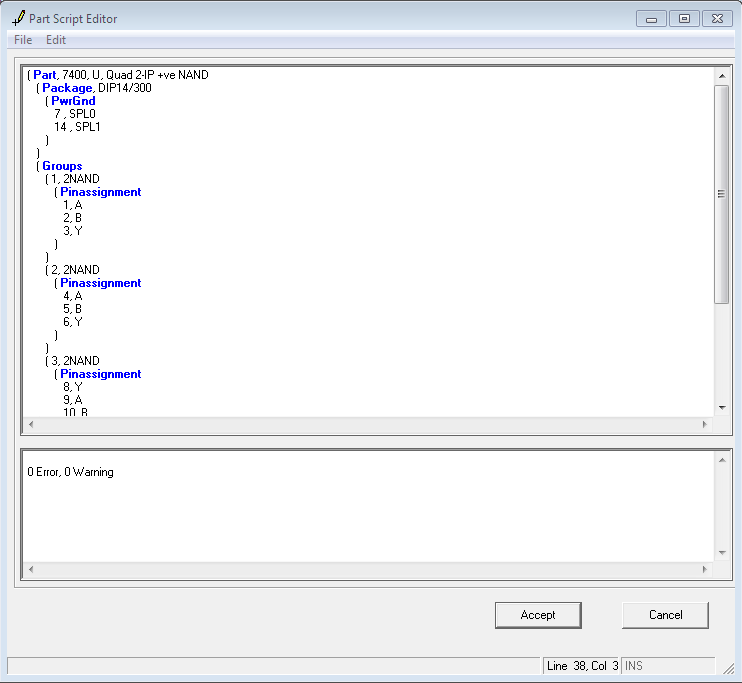
Press the Accept button to create the part.
The Library editor window will appear as shown below with the Package and symbol assigned.
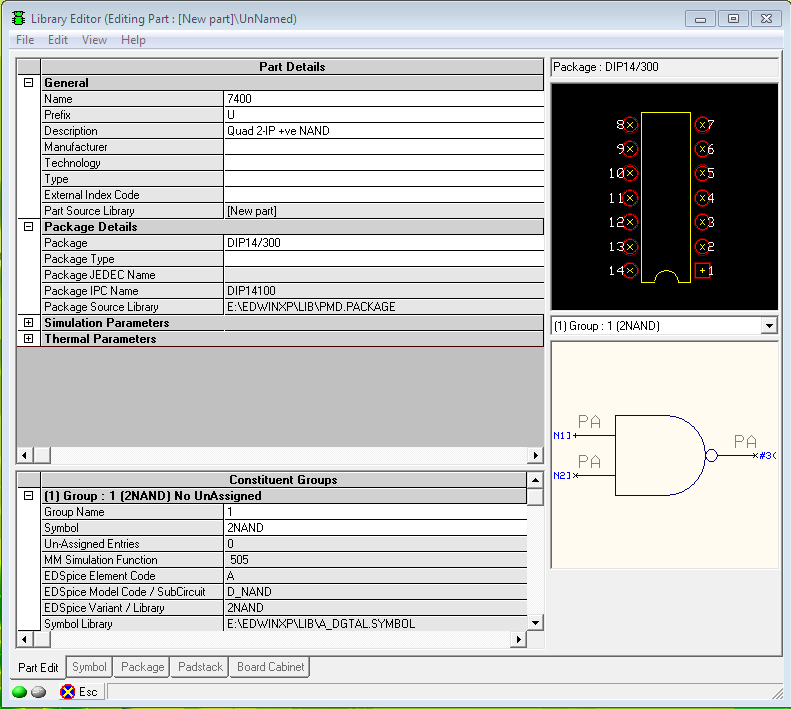
The pin-outs are also assigned, to check that go to Edit pinout option in
Edit drop down menu. The window shown below will appear.
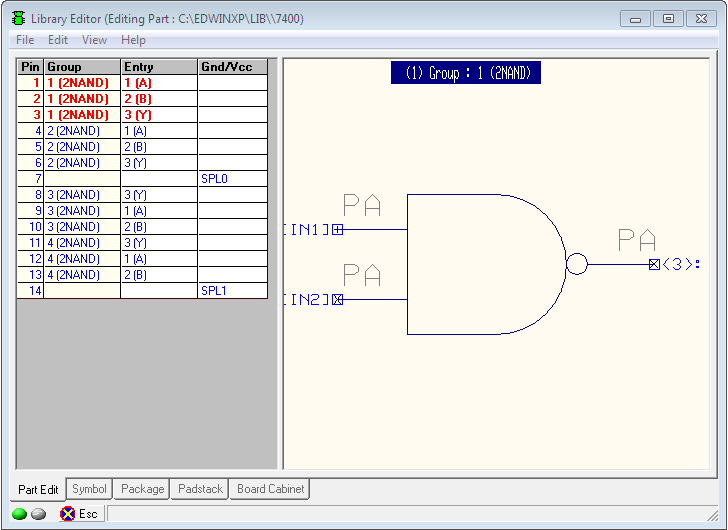
We can edit the pin outs from here if any changes is required. Now select
Back to part details option in Edit menu to go back to the main window.
Further Details like Manufacturer, Technology, Type etc can be added from the main
Library Editor Window.
Save the part. Now the part can be used.