Library Editor
It is now possible to insert arc at polygon edges . This option is included in Stretch item function tool.
Feature:
Implemented Arc insertion in polygon
 Insert arc at polygon vertex.
- Insert arc in polygon segment.
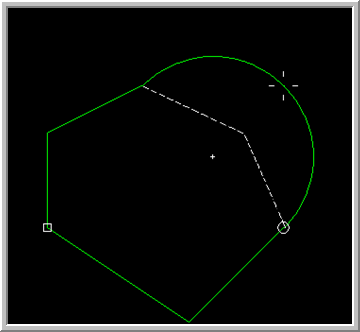
Insertion of arc at polygon vertex:
Draw polygon using the create polygon option. Select Stretch item tool options. Enable Insert arc (F11) option and click on any vertex of the polygon where arc is to be implemented. An arc with start point as vertex before the selected vertex and end point as vertex after the selected vertex is inserted. The arc inserted is as shown below:
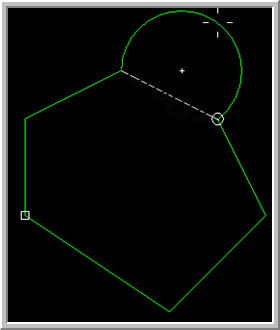
Insertion of arc in polygon segment:
To insert an arc in any segment of a polygon, select Insert arc (F11) tool and click on segment of the polygon
which is to be replaced by an arc. The arc is inserted with start and end point as start and end points of the
selected segment. In both cases the arc can be stretched to get the required radius and to end the arc insertion use
 Finish Polygon option.
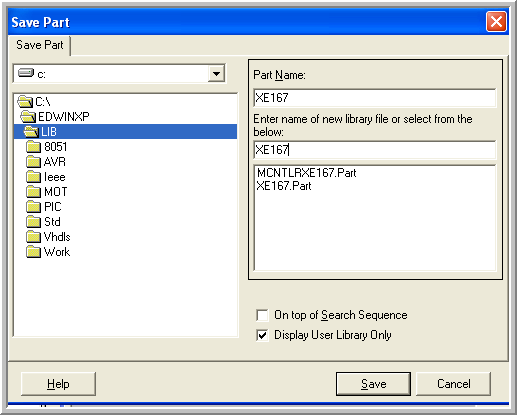
Added an option to display user library
Enabling the option 'Display user Library only' in the Save dialogue box, lists out user libraries.
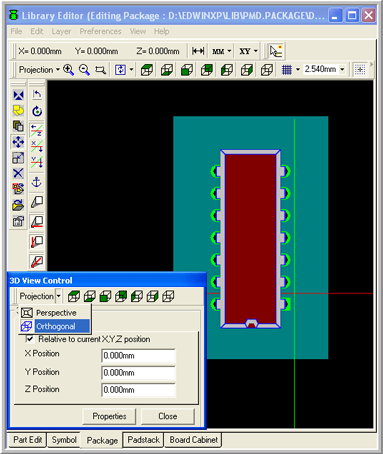
3D View Control (Package View)
3D View Control dialog box provides facility to view packages from various angles in X, Y or Z planes. This dialog may be invoked from the menu Edit | 3D Viewer. By default the dialog opens as shown below:
3D Edit View
Click on any option to get a corresponding view of the board from that direction.
Cursor Position
Allows to change the cursor position textually. Each axis moves to the position entered in the respective textboxes. If Relative to current X, Y, Z position is checked, new position is the sum of current cursor position and entered value.
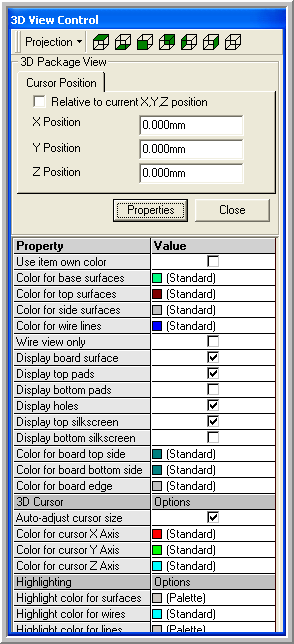
Properties
Click on PROPERTIES button to get a dialog as shown below.
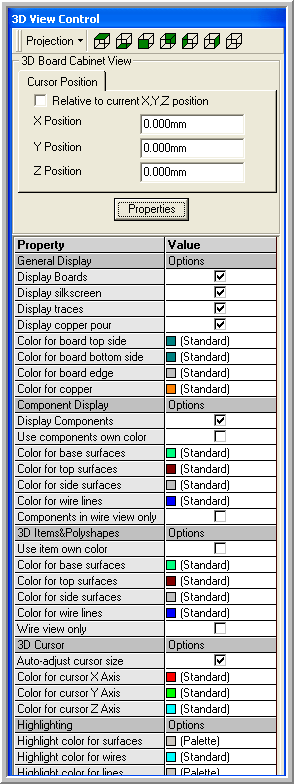
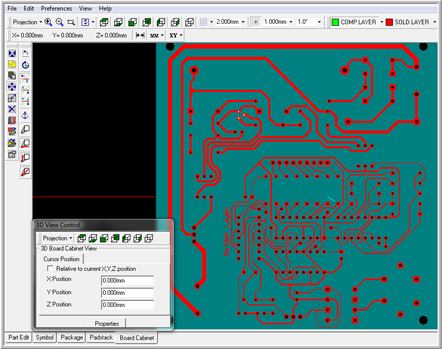
3D View Control (Board Cabinet View)
3D View Control dialog box provides facility to view cabinets and boards mounted within the cabinets from various angles in X, Y or Z planes. This dialog pops up automatically on entering the Board Cabinet Editor. By default the dialog opens as shown below:
3D Edit View
Click on any option to get a corresponding view of the cabinet from that direction.
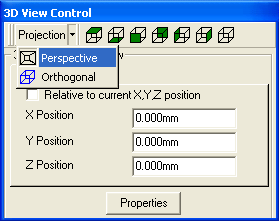
Orthogonal Top View
Perspective Isometric View
Perspective Bottom View
Properties
Click on PROPERTIES button to get a dialog as shown below.