Advantages of EDWinNET over EDWinXP
- EDWinNET is the latest electronics CAD software developed by Visionics India Pvt Ltd.
- It is the conversion of EDWinXP to a new platform,.NET with some advanced features over EDWinXP.
- EDWinNET has a totally integrated structure.It features seamless integration between all its modules facilitating automatic front and back annotation.
- It looks better than EDWinXP.

- Faster operation.
- Compatible to newer Windows operating sytems like Windows 10 and Windows 8.
- The Activation Code supplied for the software after purchase can be used for activating the software multiple times in the same computer.
- Higher usability
- Better Security
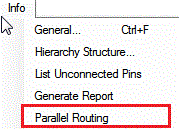
- Parallel Routing in Schematic Editor is an additional feature in EDWinNET.This option can be selected from Info menu in Schematic Editor, select Parallel Routing option.This will enable the parallel routing mode.The operation can be cancelled by clicking ESC.
- Ribbon type menu.
Schematic Editor

- EDWinNET has an additional feature of Junction Point On/Off in Schematic View.

- More User friendly Software.
- A new menu called Hide Tabs is included in EDWinNET.All the tabs can be hided by clicking on this menu,so that the workspace can be increased.

The tabs can be reloaded by clicking on the Show Tabs menu.

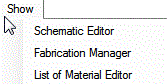
- Switch To in EDWinXP is renamed as Show in EDWinNET.Clicking on this menu in Schematic Editor will provide a dropdown menu as shown below
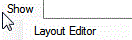
User can switch to Layout Editor by clicking on the option Layout Editor.
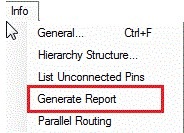
- Placement Report
Select Info menu in Schematic Editor → Generate Report.The details of the circuit containing Part Name, Schematic Name, Page Number, File System Location of the Part Library and X and Y co-ordinate location can be saved as *.xls, *.ods, etc
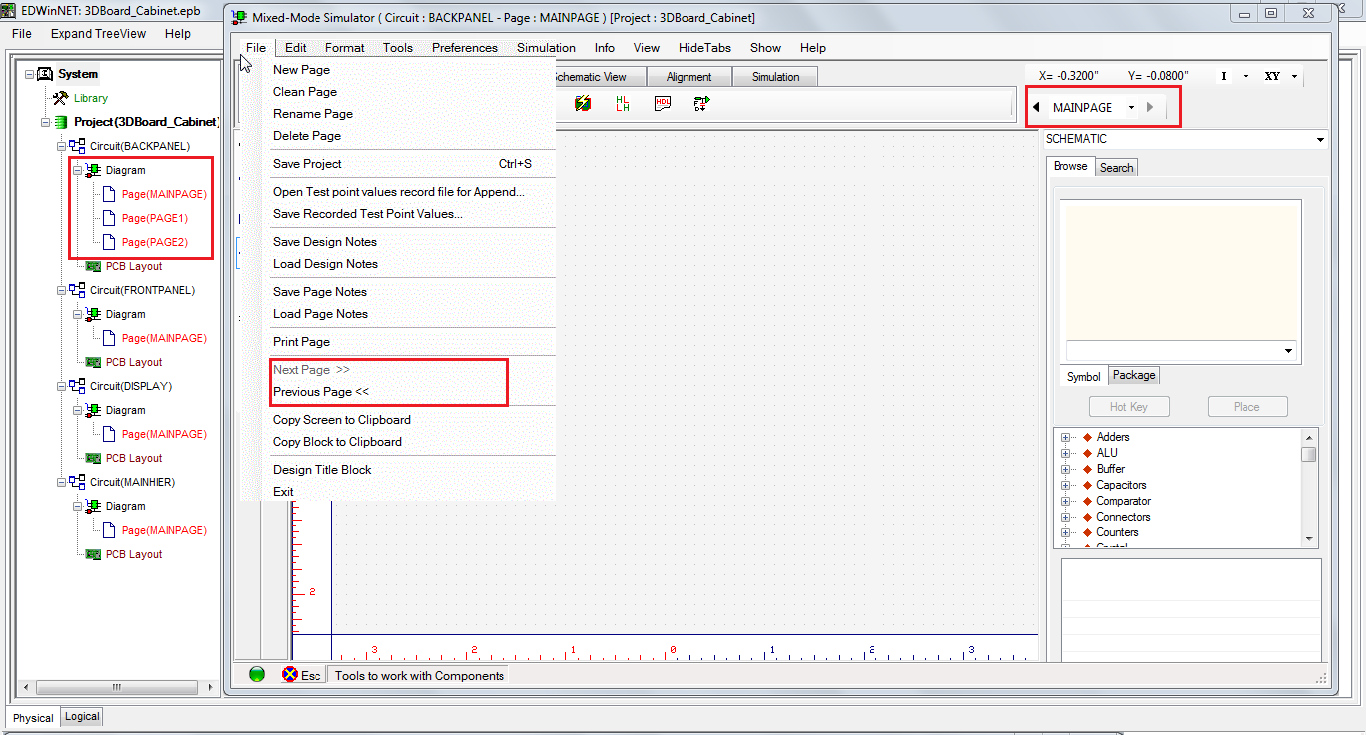
- Menu added for switching between different pages in the circuit
If there are more than one page for a circuit in Schematic Editor , this tool will help to switch between different pages in the circuit by the following steps
Select File menu in Schematic Editor ,click Next Page >> and Previous Page << or by clicking the arrows provided in
Layout Editor
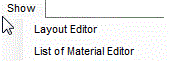
- In Layout Editor,clicking on Show menu will provide a drop down menu as shown below
User can switch to Schematic Editor,Fabrication Manager,List of Materials Editor by clicking on the corresponding options.
- Similarly Fabrication Manager have Show menu which provides facility of switching to Layout Editor and List of Materials Editor.
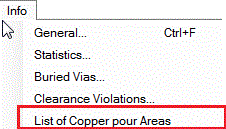
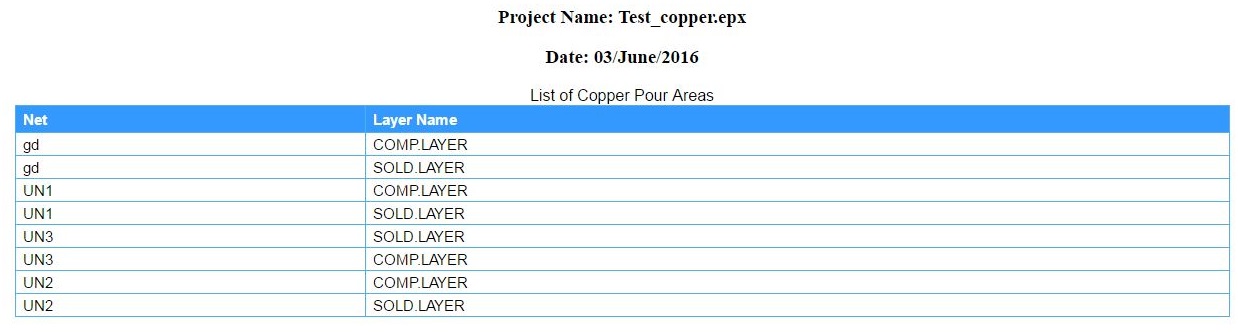
- List of Copper pour Areas in Layout Editor is an additional feature.This option can be selected from the Info menu.
A window will appear that contains the list of copper pour areas in the circuit.
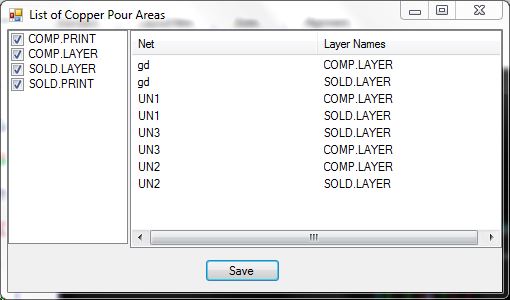
Finally, we can save the list of copper pour areas in your system as html file.
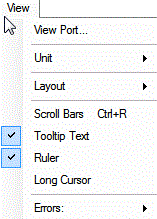
- Added cross lines in Long Cursor
Select EDWinNET-Main → PCB Layout →Edit PCB Layout → View → Long cursor.
Click on the Long cursor it will enable
After click on this option, go to Tools → Connections and draw the Traces in 45 degree more easily.
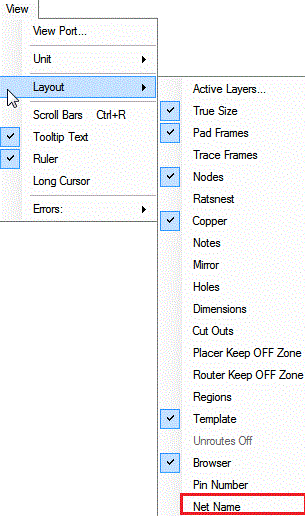
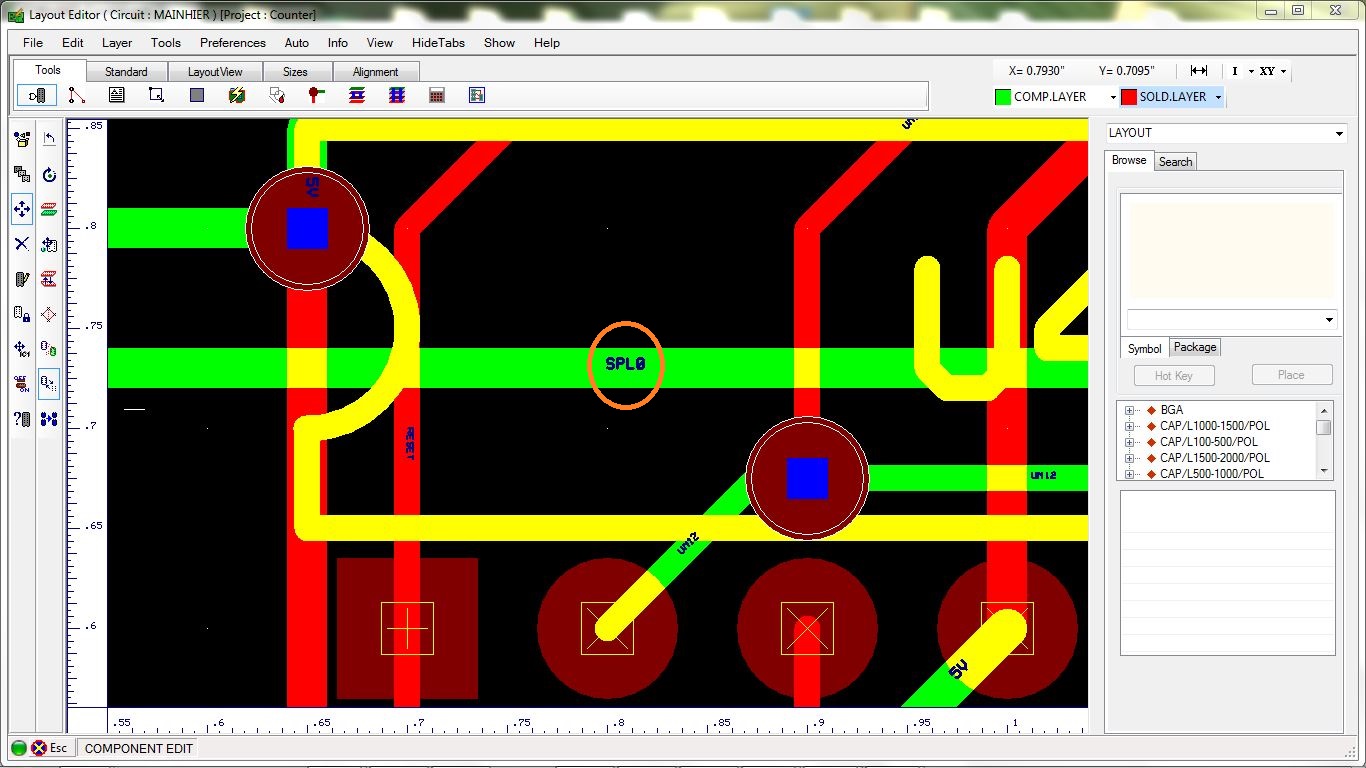
- Display of NetNames on Trace (On/Off)
In Layout Editor display the Net Names of each nets for identification.
Select EDWinNET-Main → PCB Layout → Edit PCB Layout → View → Layout → NetName
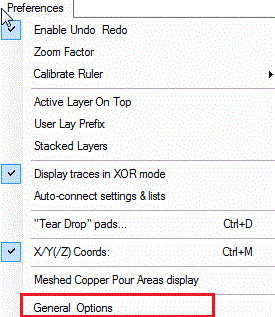
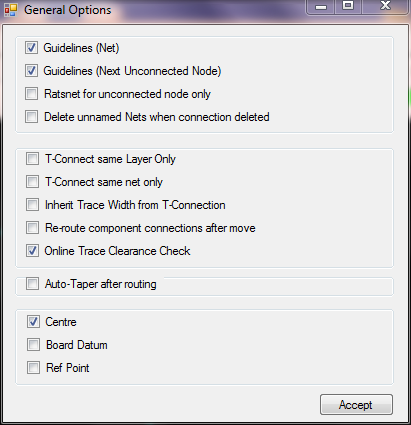
- General Options in Preference menu
Select EDWinNET-Main → PCB Layout →Edit PCB Layout → Preference → General Options
General Options window is shown below.
Library Explorer
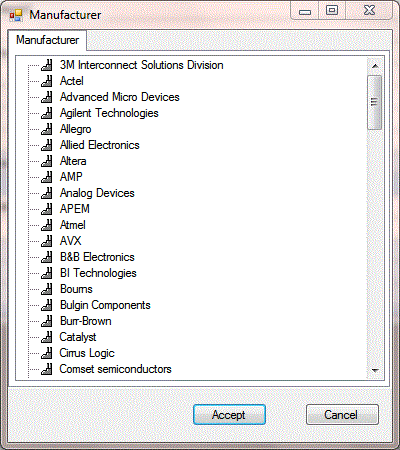
- Added 27 new manufacturers. It can be invoked by Selecting EDWinNET-Main → Library → Library Editor. Click on the tab corresponding to manufacturer.A list of manufacturer appears.
- More Libraries are added
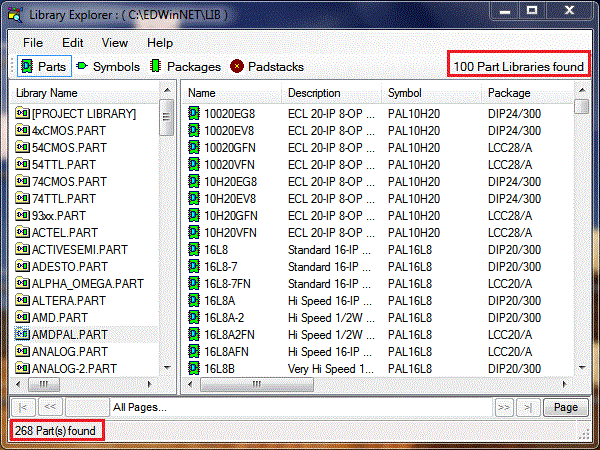
- The Library Explorer window shows the total number of Libraries in the top right corner and the bottom left corner shows number of items in the selected Library.
- A new tab called Editor is included in Library Editor.Clicking
 tab will display a list as shown below.
Library Editor
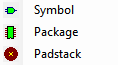
Clicking on each of these Symbol,Package and Padstack will enable switching to Editing Symbol,Editing Package and Editing Padstack windows respectively.
- File menu in Library Editor has an additional option called Export Pinlist which enables the user to export the pinlist.

- A Symbol,Package and Padstack tab is included in the Library Editor which helps the user switching to Editing Symbol,Editing Package and Editing Padstack windows respectively.

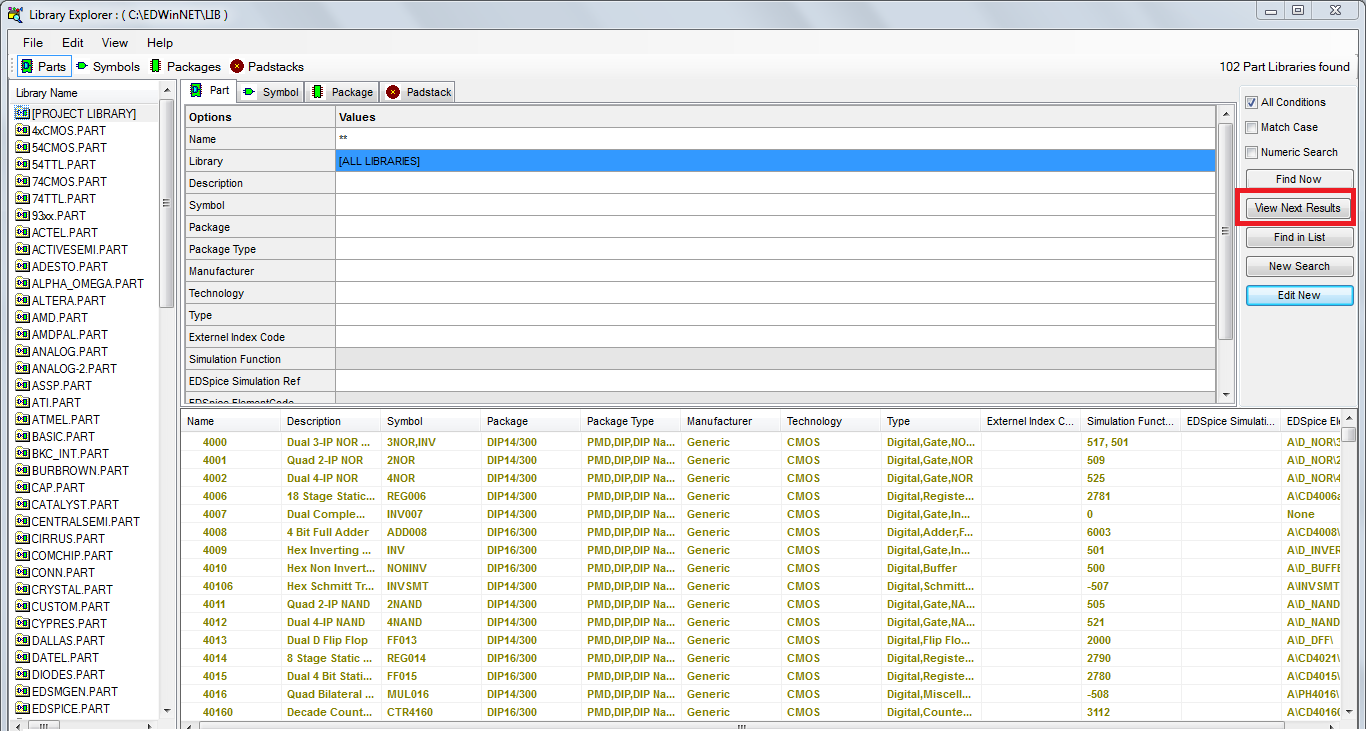
- Library Browserin the Library is added with a new button "View Next Results" which provides a better control over displaying of Search results. This feature enables the user to view results in sets of 1000.
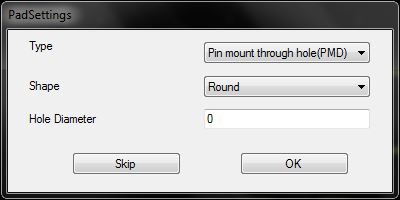
- When the tab Padstack in Library Editor is clicked
 the following window appears
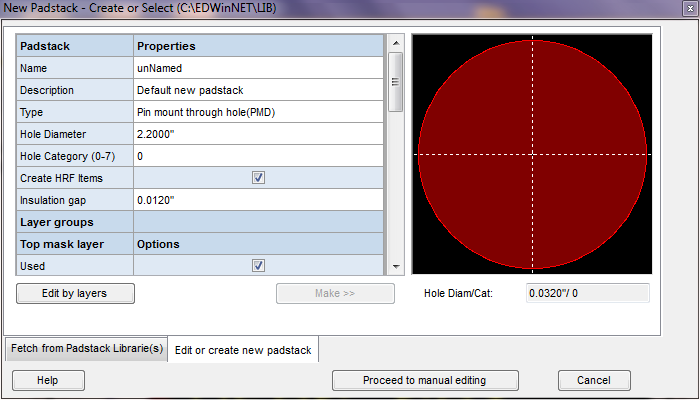
Clicking on OK will opens the following window having the mentioned features.
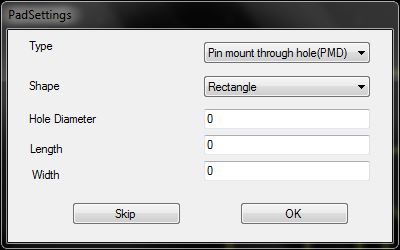
- Similarly in case where Type is selected as Pin mount through hole(PMD) and Shape as Rectangle,the following window appears.
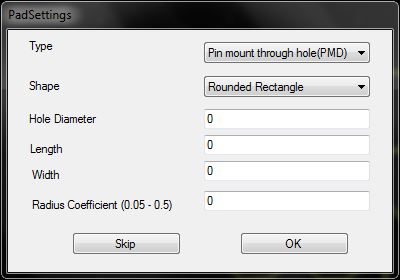
- When Type is selected as Pin mount through hole(PMD) and Shape as Rounded Rectangle,the following window appears.
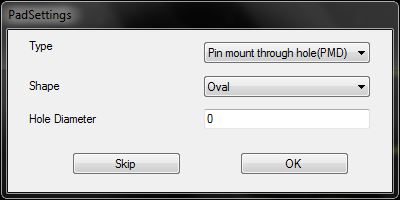
- When Type is selected as Pin mount through hole(PMD) and Shape as Oval,the following window appears.
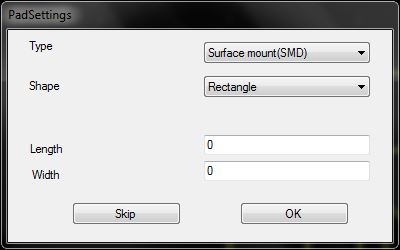
- In case of selecting the Type as Surface mount(SMD) and Shape as Rectangle,the following window appears.
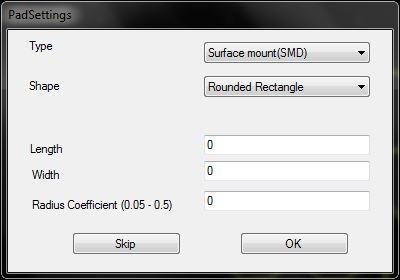
- Selecting Type as Surface mount(SMD) and selecting the Shape as Rounded Rectangle displays the following window.
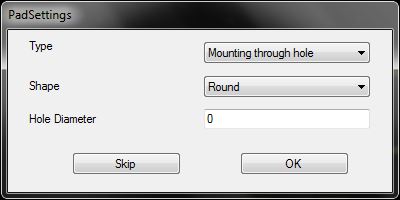
- Selecting Type as Mounting through hole and selecting the Shape as Round displays the following window.
- Selecting Type as Mounting through hole and selecting the Shape as Rectangle displays the following window.

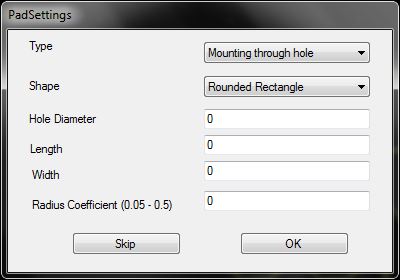
- Selecting Type as Mounting through hole and selecting the Shape as Rounded Rectangle displays the following window.
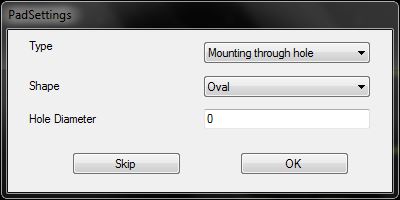
- Selecting Type as Mounting through hole and selecting the Shape as Oval displays the following window.
In each of the above windows,providing the required details and clicking OK will displays the following window having the mentioned features.

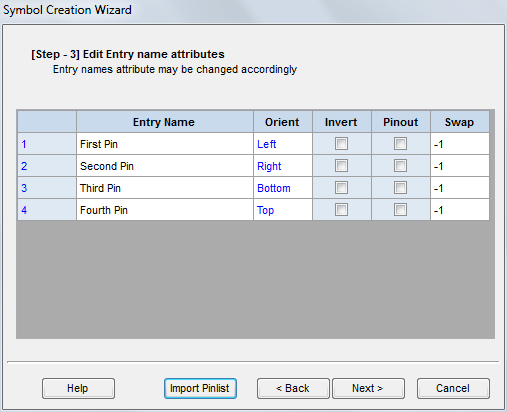
- Import Pinlist
This can be invoked by Selecting Library Editor → Select "Symbol" → File → New Symbol Using Wizard → Import Pinlist .
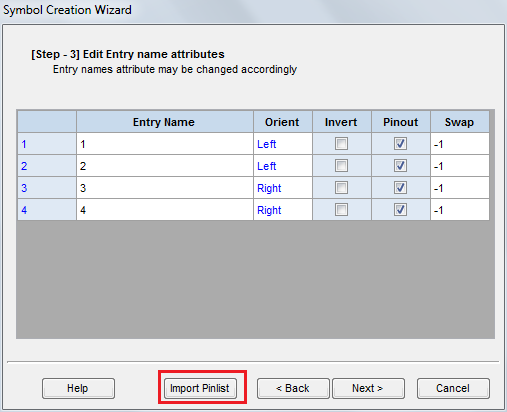
Select the *.txt file from the system for import pinlist.
Mixed Mode Simulation
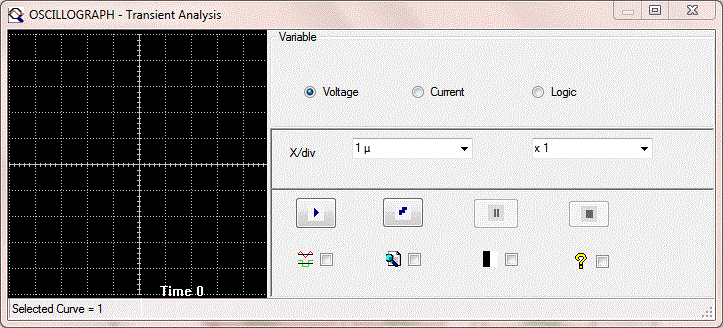
- Oscillograph in EDWinNET is more advanced than in EDWinXP.This can be invoked by clicking on Simulation → Run Transient analysis(Oscillograph) in Mixed-Mode Simulator window.
- Instruments menu in Mixed-Mode Simulator has an option called measure parameters.This can be invoked by clicking Tools → Instruments → Measure parameters.
